DIY : earth boxes


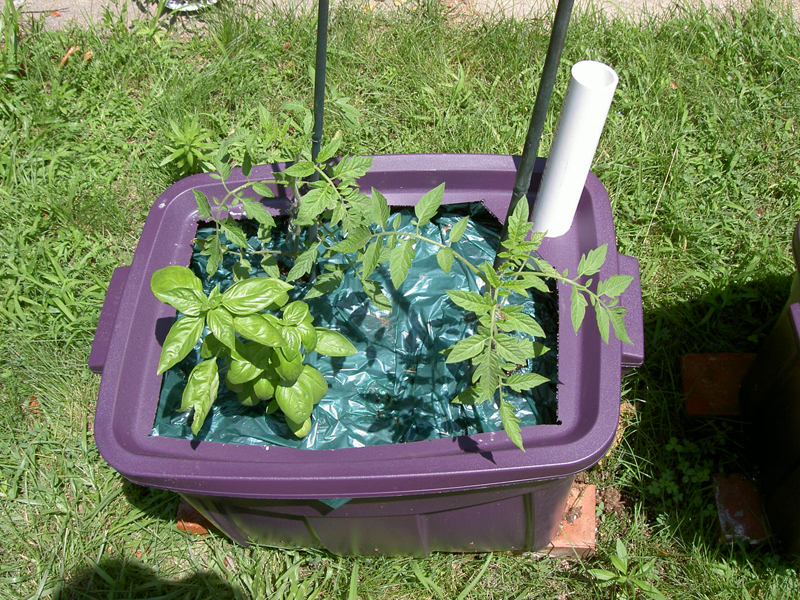
One of our homemade ‘earth boxes.’

I’ve never really been a master of DIY projects. There are plenty of things I do for myself or the house, don’t get me wrong. It’s just that I tend to learn to do the things I want to learn to do and leave the things I don’t want to learn to do to other people. Whether I could do it myself doesn’t always factor into it, and I have never really been motivated to undertake projects specifically to see if can or to save money. Again, unless it’s something I like doing myself (like painting). Which is all to say that on my own I would have simply not planted tomatoes before I either (1) spent the money on actual Earth Boxes or (2) learned how to make them myself.

I’m not on my own, though, and the siren call of free tomato plants — started by our neighbor across the street who did spring for Earth Boxes and my partner’s boss’s boss who has an enormous garden on a farm about an hour away — was too much to resist, even before all the hullabaloo about salmonella. For once I was the voice of the wet blanket (‘But you don’t even like tomatoes! But we’ll already be getting tomatoes from our farmer in the summer CSA!’) and he was the not-to-be-deterred optimist (‘We’ll make sauce! We’ll give them away! It’ll be fun!’). With a small passel of wee tomato plants on our porch, and some pepper plants thrown in for good measure, he decided to go the DIY route, relying on the instructions of those who had already tried this at home as guidance.

In the end, the most difficult part of the project was mixing the dehydrated compressed potting mix with water, something I did by hand. I got lazy the second time around and overdid it with the hose, ending up with what could only be described as a big muddy mess in two boxes. To get the dirt back to wet-but-not-sloppy, I transferred mud into the small ceramic pots I was using for herbs and into the fourth box, and then (re)introduced dry mix into all three boxes. This worked in the end, but I ended up doing just as much hard hand-mixing as I would have, so I’d recommend taking it easy with the hose. It also remains to be seen whether I have irretrievably clogged the drainage holes and/or introduced too much soil into the reservoir; it’s not clear this last is possible, but not having read the actual instructions (Not My Project) I don’t know for sure.

Having assembled the boxes and planted the plants, we are now waiting to see whether following the fertilizing recommendations — which seemed a bit extreme to me — will result in lovely big plants or poor wee things with their roots burned to death. So far it looks like we have five plants that are loving it, one plant that’s gone the way of root burn, and two that took a licking and kept on ticking. I planted basil in among the tomatoes and the peppers seem to be happy in their own pot (the first one we assembled, from a larger bin, where the base fits more snugly into the box and the side holes drain better). Now all we have to do is water them every day and wait.
DIY : earth boxes

garden log : what a difference a week makes


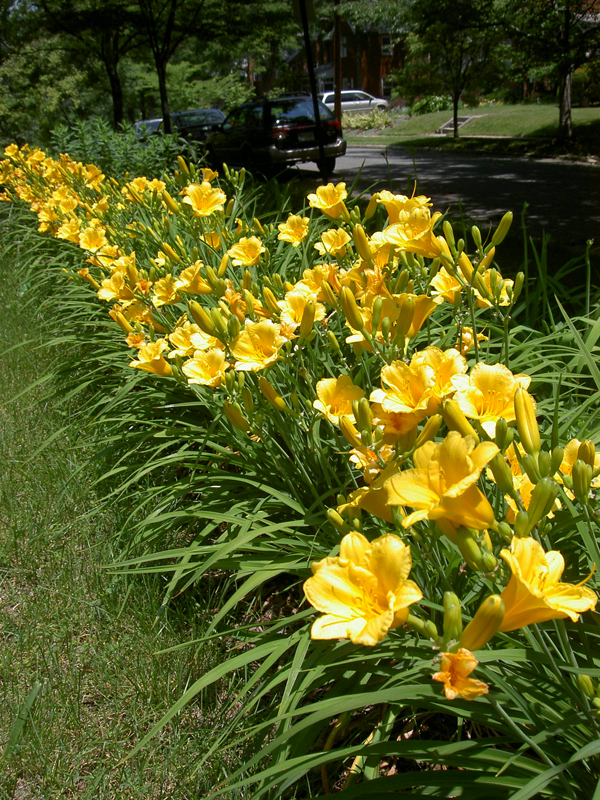
Blooming row of yellow daylilies at the top of the front bed.

We returned from our trip this week to the sight of our yellow daylilies in full riotous bloom. They had started to bloom before we left, but the five days of rain and sun did them good and they are magnificent now. At some point I’m sure they’ll need to be thinned and I might break up the monotony with some other plants, or at least different varieties in various shades of yellow and orange. For now, though, I’m just enjoying the bright swathe of color. There’s really no comparison to how they looked last year; this spring’s rain and the additional year to become established have made them into a veritable wall of flowers.

Our days away have also made it possible to see the impact of the herbicides on the patches of poison ivy that we’re working to eradicate from the yard. Not much, as the case may be: we’re definitely going to need to reapply, possibly several more times through the summer. Ah well. Despite the claims of the label — and the exhortations to phone poison control of any of the spray whatsoever comes into contact with any part of my body — I suspected that our ivy might not be so easily vanquished. No rush, though. If not this year, next year; poison ivy is nasty enough that I won’t be giving up so easily.


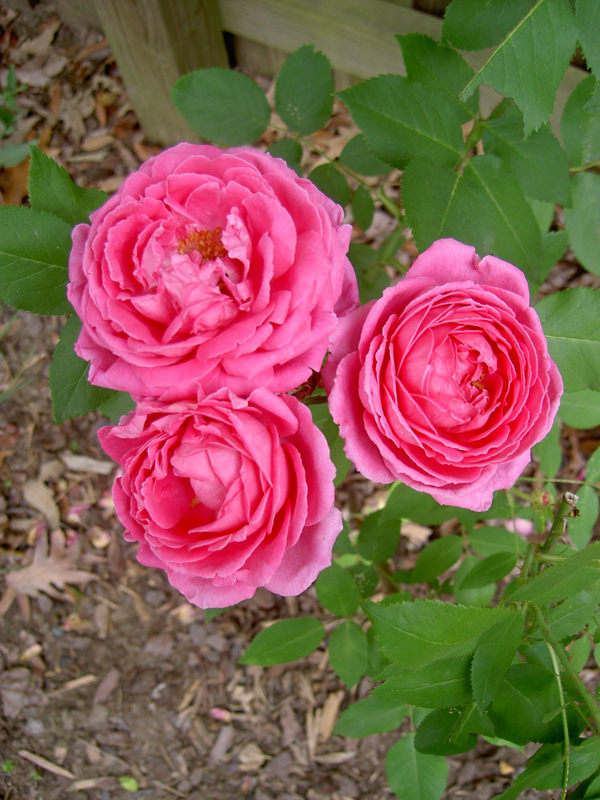
Three blooms on the Louise Odier rose.

Sadly, our week away meant we missed the last of the wonderfully fragrant Louise Odier blooms. Perhaps the bush will bloom again later in the season; this will be summer I learn as much as I can about the roses I’ve inherited. I plan to pick the brain of a gardener acquaintance on the verge of retirement, during the three days per week he’ll be at home. Hopefully between his advice and books from the library I’ll be able to develop a strategy for moving the bushes without killing them come autumn. For now, I enjoy the multitude of blooms on the Blaze bushes and work on sketching out plans for my little island bed of herbs.

garden log : what a difference a week makes

garden log : a whole lot of planning


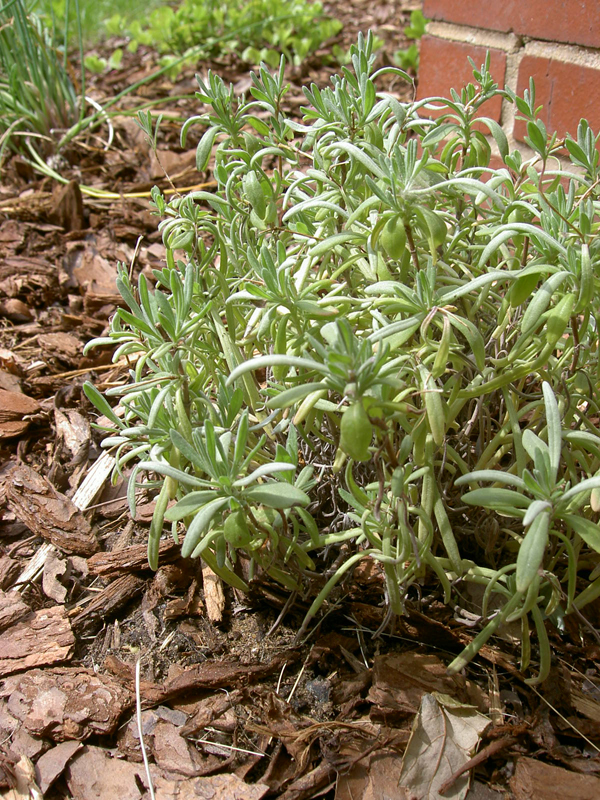
The lavender bursting out in new growth.

My garden notes these days are trending more toward the ‘to be undertaken when I have more time, money and energy’ and away from ‘done done done!’ Happily, growth continues without me: the lavender has taken to its new home and is sending out all kinds of shoots, the first yellow daylily of the summer appeared this morning, and the roses continue to bloom. I haven’t made any more progress on the peony identification front—I emailed Kelway’s asking for help, but haven’t received a response—but I have a new bloom to work with: the transplanted peonies produced a single blossom that opened up today, so I’ll take some photos and see what I can learn.

In terms of the future, I’ve been researching roses and sketching out a plan for preparing a new bed and moving a large old climber to a sunnier roomier spot against the south wall of the addition. The prep appears to entail major soil modification, in the form of compost and topsoil addition, and the purchase of an arbor. We’ll then let the bed sit and get nice and juicy over the summer while I research how to actually move the plant in the fall. This approach has the added bonus of giving me plenty of time to shop for a suitably un-kitschy arbor; I’m fussy with regard to avoiding the country cottage look as much as possible while still filling the house with color and the garden with flowers.

The other plant-shifting project that I have in mind for June involves the creation of a raised border bed in the middle of our front yard. Well, truthfully, at the edge of our front yard—thus the border aspect—but in the middle of the expanse of grass made up by our lawn and our neighbor’s. This bed will serve several purposes: improving the drainage of the front yard, visually defining the edge of the yard, rerouting of the letter carrier, and providing a home for several sun-loving plants that are currently hanging about in less than ideal circumstances. Over the past couple of weeks I’ve acquired three little sprouts that need to go into the ground soon. The rosemary and ‘Italian oregano’ (thyme) will go into the new bed, with plenty of room to grow into nice sizable little shrubs; both should overwinter here without a problem. The summersweet is destined for the existing bed, but its future location is currently occupied by a clump of yellow daylilies and some garlic chives. So, those two plants will be moved to the new bed as well. It’s my hope to put the small fragrant rose bush—the Crimson Glory—into that front bed as well, but I need to do a little more research on soil conditions and wind protection and that sort of thing before I make a final decision about that.

In the meantime, I water them in their little pots and hope for the best!

garden log : a whole lot of planning

garden log : peony identification project


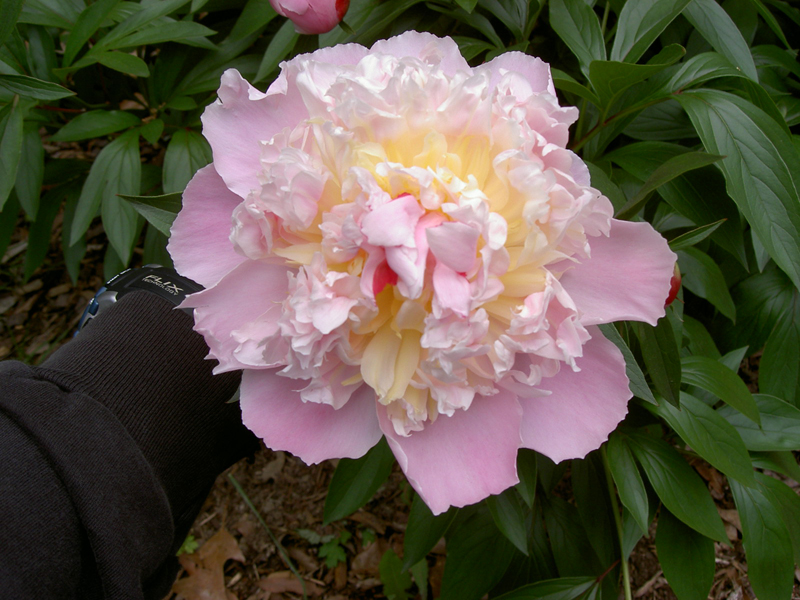
Bloom from the peony that came with the house.


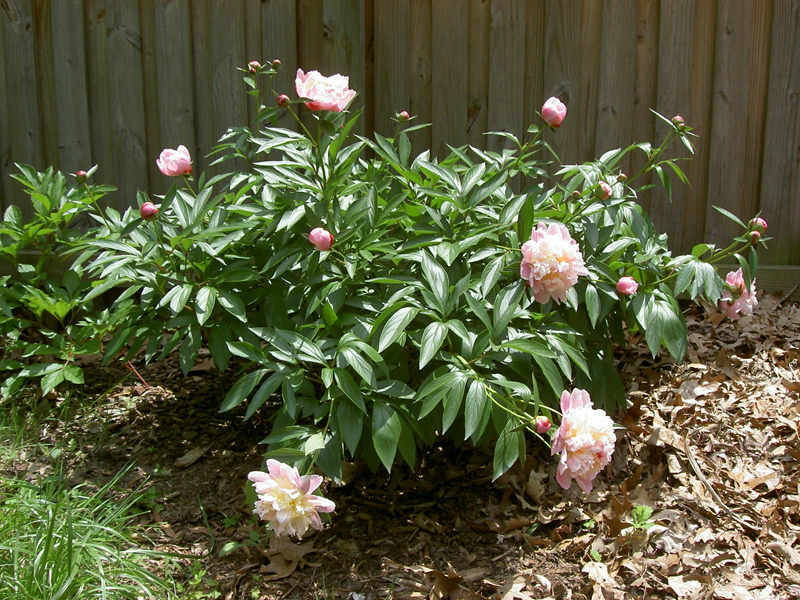
The peony bush in question.

My goal for this week has been to conclusively identify the peony that came with our house. It hasn’t been as easy as I’d hoped. Part of the problem is that I lack knowledge of the correct flower-describing terminology, which makes using the search function on HelpMeFind’s peony page more challenging and less productive than it should be. Is my bloom pink? Yellow? Double? An anemone? This was easier with the roses, as I had a borrowed rose book in front of me to provide the basics with regard to double blooms and such.

Nonetheless, by blundering around the web for a while and poring over pages of results from a Google images search on ‘peony,’ I’ve come up with two possible matches for my plant. Our house was built in 1936, and the peony was likely planted by the first owner; at the least, I’m quite sure it wasn’t planted by the most recent owners, post-1983. I first decided I had a Lady Alexandra Duff peony, based on the bloom description and the year of introduction in the United States (1932). Upon further looking, though, I’m not as certain. Our plant definitely has drooping blooms, and quite a bit more yellow in the blooms than other photos of Lady Alexandra Duff plants.

My new theory is that I have a Bridal Veil peony, introduced at an unknown point prior to 1958 and still for sale by Kelway’s. Of course, I’ve been unable to find any more information than that, and am wondering if this is an alternate name for the variety. I would love to learn the year of introduction and more of a history of the plant, so if any peony experts are reading this, let me know what you think!

garden log : peony identification project

garden log : new iris bed planted


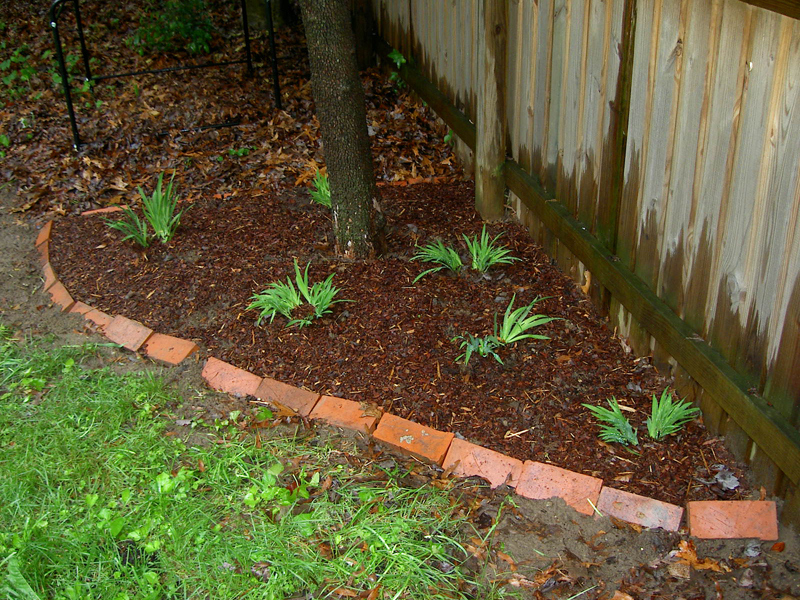
The new bed of crested irises.

I took advantage of the few days between downpours this week to clear the liriope from under the smaller dogwood and prepare a bed for the crested irises I’ve had sitting on the porch in boxes. It’s far too late for them to bloom this year, but they’re reported to spread easily and aggressively, so I’m hoping they’ll do that over the next couple of months. In an effort to both contain that spread somewhat and create a visual boundary between the bed and the composter, I edged the bed with bricks scavenged (with permission) from our neighbors’ old patio.

While working on the bed I was amused to have a pair of catbirds hanging around chattering at me. I could tell they were just waiting for me to move back a bit so they could get at all the food I was turning up with the soil. The dirt around the tree was chock full of worms; whether that was because that part of the yard is healthier than the front or because they’re staying closer to the surface of the saturated ground, I couldn’t tell you. I was reminded of our efforts to clear the pokeweed roots last summer and the way the catbirds flocked to the turned over soil. This year’s birds haven’t gotten used to us yet, I don’t think: none of them were as bold as the ones from the previous year. Already I can tell that I need to put down a thicker layer of mulch, as the squirrels have been successfully pock-marked the bed in only two days.


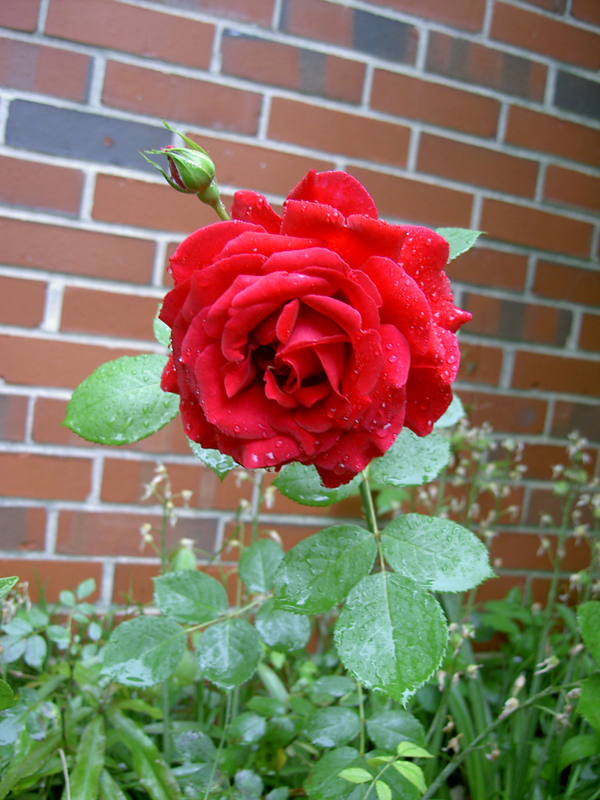
The wee rose bush at the back of the house.

One of my goals for this year is to create a better environment for the four rose bushes in the yard. I am pleased to say that the pruning I gave them last autumn seems to be helping them bush out quite a bit more this year. They’re coming in quite well, and the two smaller ones already have lovely deep blooms. I know that I need to create more space around them, as they’re getting choked by weeds and being kept from drying out. I suspect the bushes are over 25 years old, possibly longer; I don’t think the previous owners planted any. One at least, the deep red very fragrant low-growing bush at the back of the house, appears to be Crimson Glory, quite possibly from soon after its introduction as a new hybrid tea rose in 1936 (the year our house was built). It’s odd to imagine a rose older than our parents just plunked at the back of our house, but nice to have the continuity with the original owners. I hope to have as much luck identifying the three other plants!

garden log : new iris bed planted